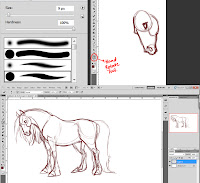
Here are the tools I work with:
1. The Hard Brush (Spacing set to 1%). To add color and details.
2. The Airbrush Round Hard (Spacing set to around 5-7%). To add shading.
3. Smudge Tool (With scatter on and set to around 60-70%). To Smooth out shading.
4. Adobe Photoshop CS5.
5. Wacom Intuos 3 A4 (Large). Pen tablets are extremely handy tools. They give a LOT more control over the digital brushes.

I open a new Photoshop Document. I usually work on large canvas with dimensions around 1500 px to 2000 px. Sometimes even more. And the resolution is set to around 300 dpi. Use higher DPI if u want to get ur drawing printed. More the pixels, more the quality of the image. So, I add a new layer (Sketch) and I use the 1st brush (Hard Round) and decrease the flow to around 20% This makes the stroke come a little light depending on how much pressure I apply to the pen. A very handy tool in PS CS 5 is the Hand Rotate Tool. You can rotate your canvas with it. It is very useful to rotate the canvas at times so you get the lines right. It is also a good practice to flip your canvas horizontally to make sure your painting looks good as if gives you a fresh look. You see, staring at the same image all the time makes you feel it is looking very nice and this can cause your drawing look weird to the other person or if you look at it after sometime.

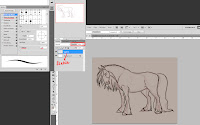
Next I change some settings of the hard round brush. I make sure the spacing is set to 1% and that the flow and opacity is 100%. I change the color to black. Add a new layer (Lineart) and start drawing the outline. MAKE SURE YOU ARE ON A DIFFERENT LAYER THAN THE SKETCH. Also, it helps to lower the opacity of the Sketch layer. Once done, I check to make sure the lines are smooth and erase out any problem areas.

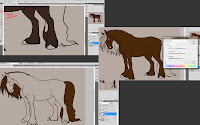
Once I am satisfied with the lineart, I add two more layers for flat coloring. One for the body and one for the hair. Flat coloring is basically adding simple color to your character. In order to speed up your coloring, you can use the Magic Wand Tool and select whatever area you want to color. After I select the area, I go to Select>Modify>Expand. Then I enter 1 in the dialog box and hit enter. What this does is, it expands your selection evenly. I was not satisfied with the brown color, so I pressed Ctrl+U, which opened up the Hue-Saturation dialog box and fiddled with it till I was happy with the color. Then I selected the hair and colored them too. Also, if u want to de-select your selection, just press Ctrl+D.

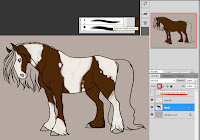
Now, I love paint horses and decided to make this one a paint horse. Paint horses have 2 colors on their bodies and white plays a major role. I selected my 2nd brush (The Airbrush Round Hard), lowered down the Flow a bit and added the white bits. But before doing that, I switched on a very important tool; the "Lock Transparent Pixels". This is another VERY handy option. Using that, I can paint different colors on the Layer that has been locked. As you can see, the white paint is only on the body and nowhere else. Very handy.
Please go to PART 2 to see what I do next.

No comments:
Post a Comment